How to Renovate a Kitchen: A Practical Step-by-Step Guide for QLD Homes
If your kitchen looks fine in photos but feels hard to use day to day, the fix is rarely “new colours”. It’s almost always layout, storage, lighting, and surfaces that suit how you cook.
This guide walks you through how to renovate a kitchen from first decisions to final fit-off. Use it for a DIY kitchen refresh, a full DIY kitchen renovation plan, or as a checklist before you talk with a kitchen company.
Step 1: Decide what type of renovation you’re doing
Start by choosing one of these paths:
Option A: Cosmetic kitchen renovation (keep the cabinets and layout)
A cosmetic kitchen renovation suits you if the cabinet boxes are solid and the kitchen workflow is already decent.
Common upgrades include:
- New handles and hinges (soft-close where possible)
- Tapware and sink replacement
- Splashback update
- Improved lighting
- Painting walls, ceilings, and sometimes cabinet doors
- New benchtop (only if the cabinets can take the load and levels are right)
This approach keeps costs and disruption down, but it won’t fix poor storage or awkward movement.
Option B: Full remodel (new cabinetry, better storage, layout changes)
Choose a full remodel if you need to:
- Add storage and drawers where they actually work
- Change the kitchen design for better movement
- Replace damaged cabinets or swelling boards
- Upgrade to integrated appliances
- Improve clearances around fridge, island, and walkways
If you’re at this stage, you’re closer to the “build a new kitchen” end of the spectrum.
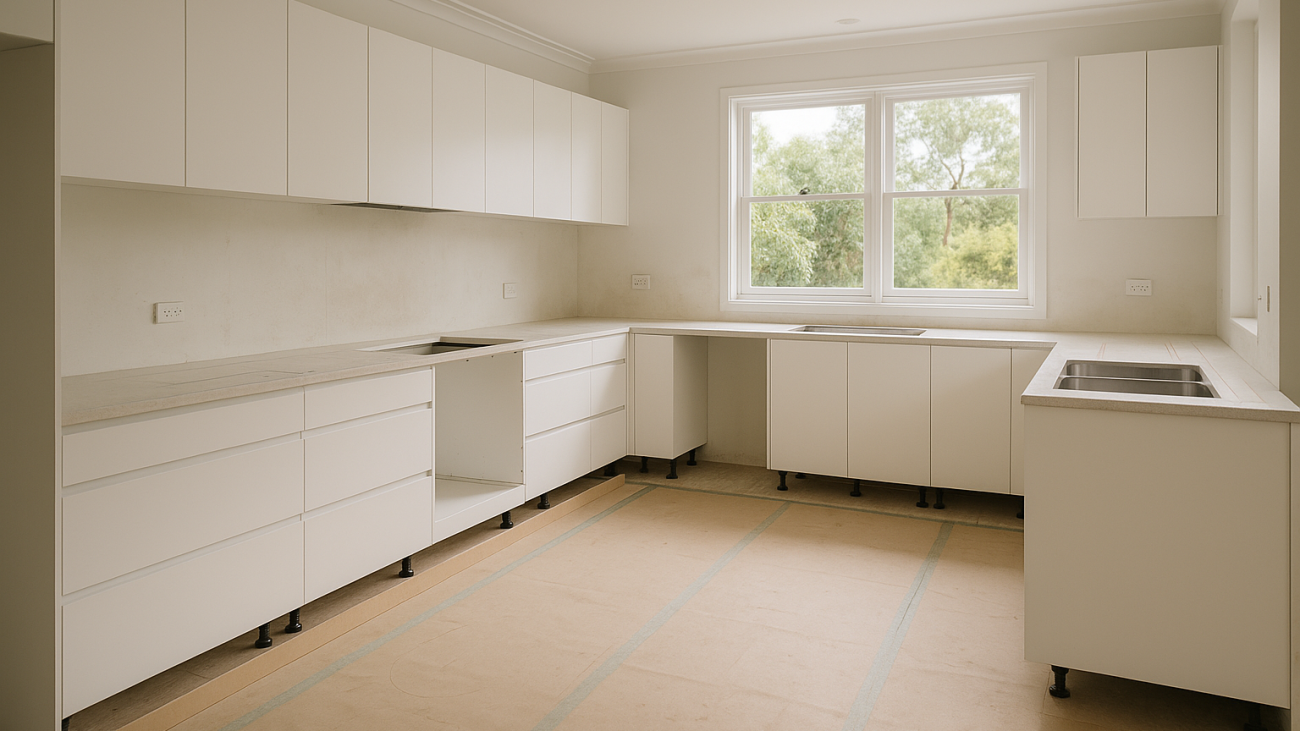
Step 2: Measure properly (and record what matters)
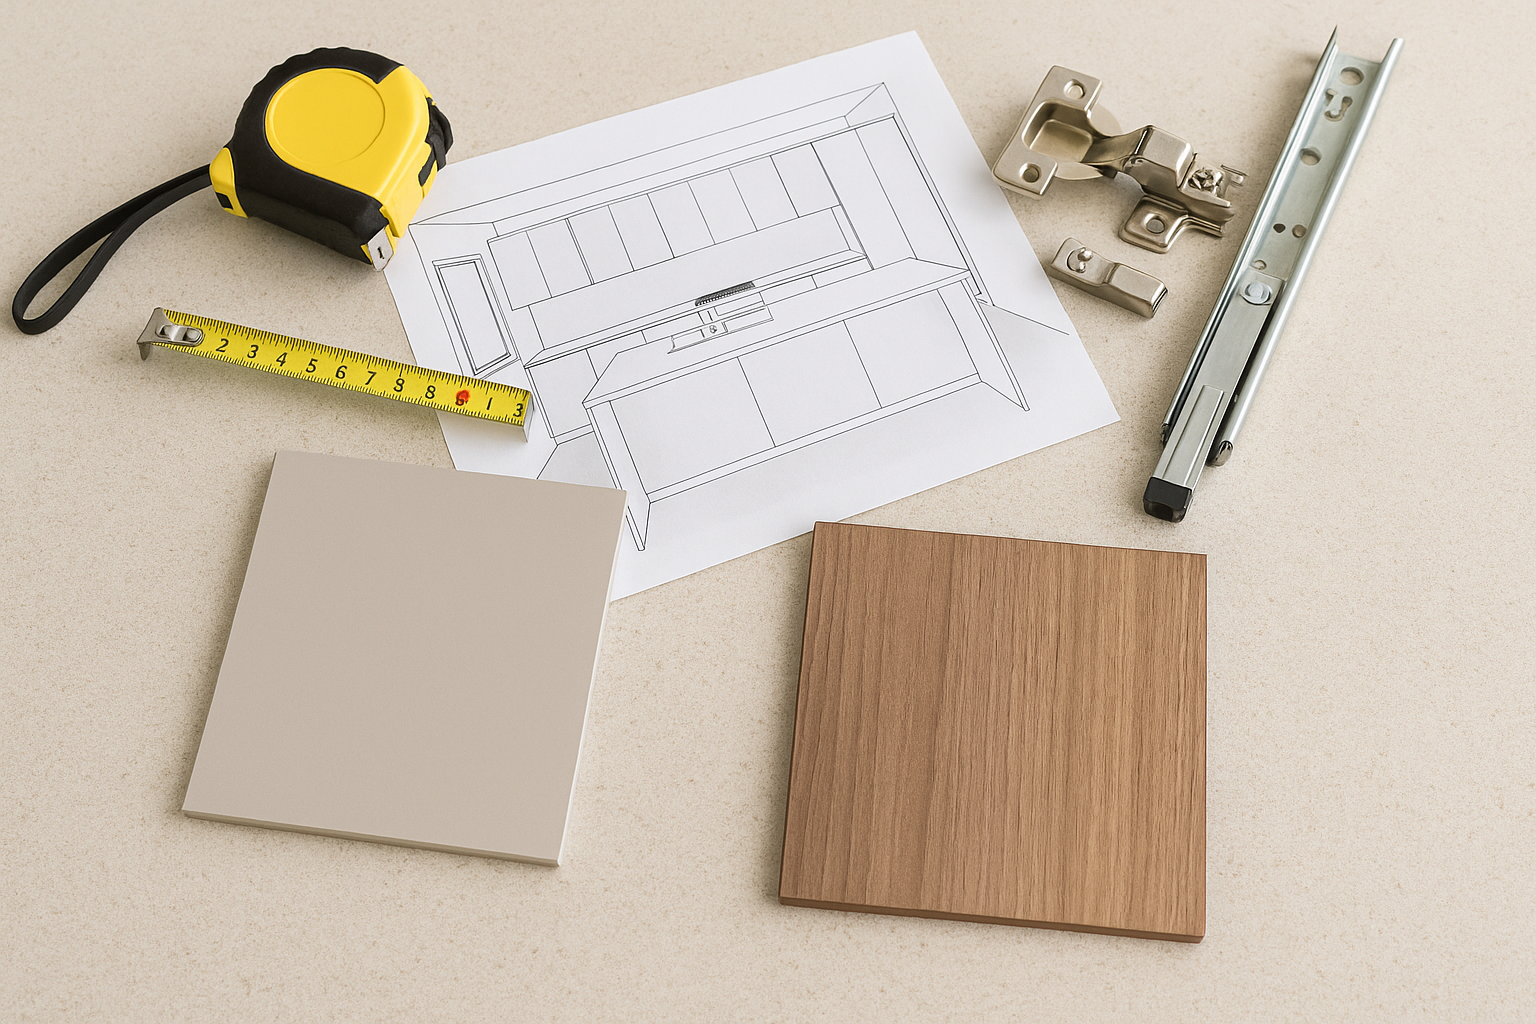
Accurate measurements prevent expensive rework.
Measure and note:
- Room length and width (in mm)
- Ceiling height
- Window and door sizes, and how they open
- Bulkheads, nib walls, cornices, and any odd angles
- Current plumbing points (sink, dishwasher)
- Current power points, lighting, and switch locations
- Rangehood ducting path if you have one
Tip: Take straight-on photos of each wall and label them. It helps later when you’re comparing kitchen designs.
Step 3: Lock in your priorities (function first, then finishes)
Write down your “non-negotiables” before you collect kitchen design ideas online.
Consider:
- Do you cook most nights or mainly reheat and assemble meals?
- Do you need two people to work in the kitchen at once?
- Do you want seating at an island, and how often will it be used?
- Where will bins go, and can you access them while cooking?
- What annoys you right now: bench clutter, lack of pantry, poor lighting, no power points?
This list keeps your DIY kitchen design on track when choices pile up.
Step 4: Plan a layout that works in real life
A good kitchen design is based on clear zones:
- Storage zone (fridge, pantry)
- Prep zone (clear bench near sink, knives, boards)
- Cooking zone (cooktop, oven, rangehood)
- Cleaning zone (sink, dishwasher, bins)
Clearances to respect
You don’t need to memorise rules, but these checks prevent daily frustration:
- Keep walkways clear so two people can pass without turning sideways.
- Make sure drawers and the dishwasher can open without blocking the main path.
- Leave landing space beside the cooktop and beside the sink.
- Don’t trap the fridge behind an island or a door swing.
If you’re gathering kitchen design ideas, compare them against your daily routine. A great-looking plan that forces you to carry hot trays across the room won’t age well.
For inspiration that still prioritises function, see: Modern kitchen designs and ideas.
Step 5: Choose cabinetry that suits your household (not just a photo)
Cabinetry is the backbone of most DIY kitchens and custom builds. The choices here affect cleaning time, durability, and how your kitchen feels after a few years.
Doors and panels
Common options include:
- Laminate: hard-wearing and family-friendly, good for busy kitchens.
- 2-pack painted: smooth finish and colour flexibility, but shows chips more than laminate.
- Timber veneer: warm and natural-looking, needs sensible care around water and heat.
Hardware
Choose quality hinges and runners. Soft-close is worth it for noise reduction and longevity.
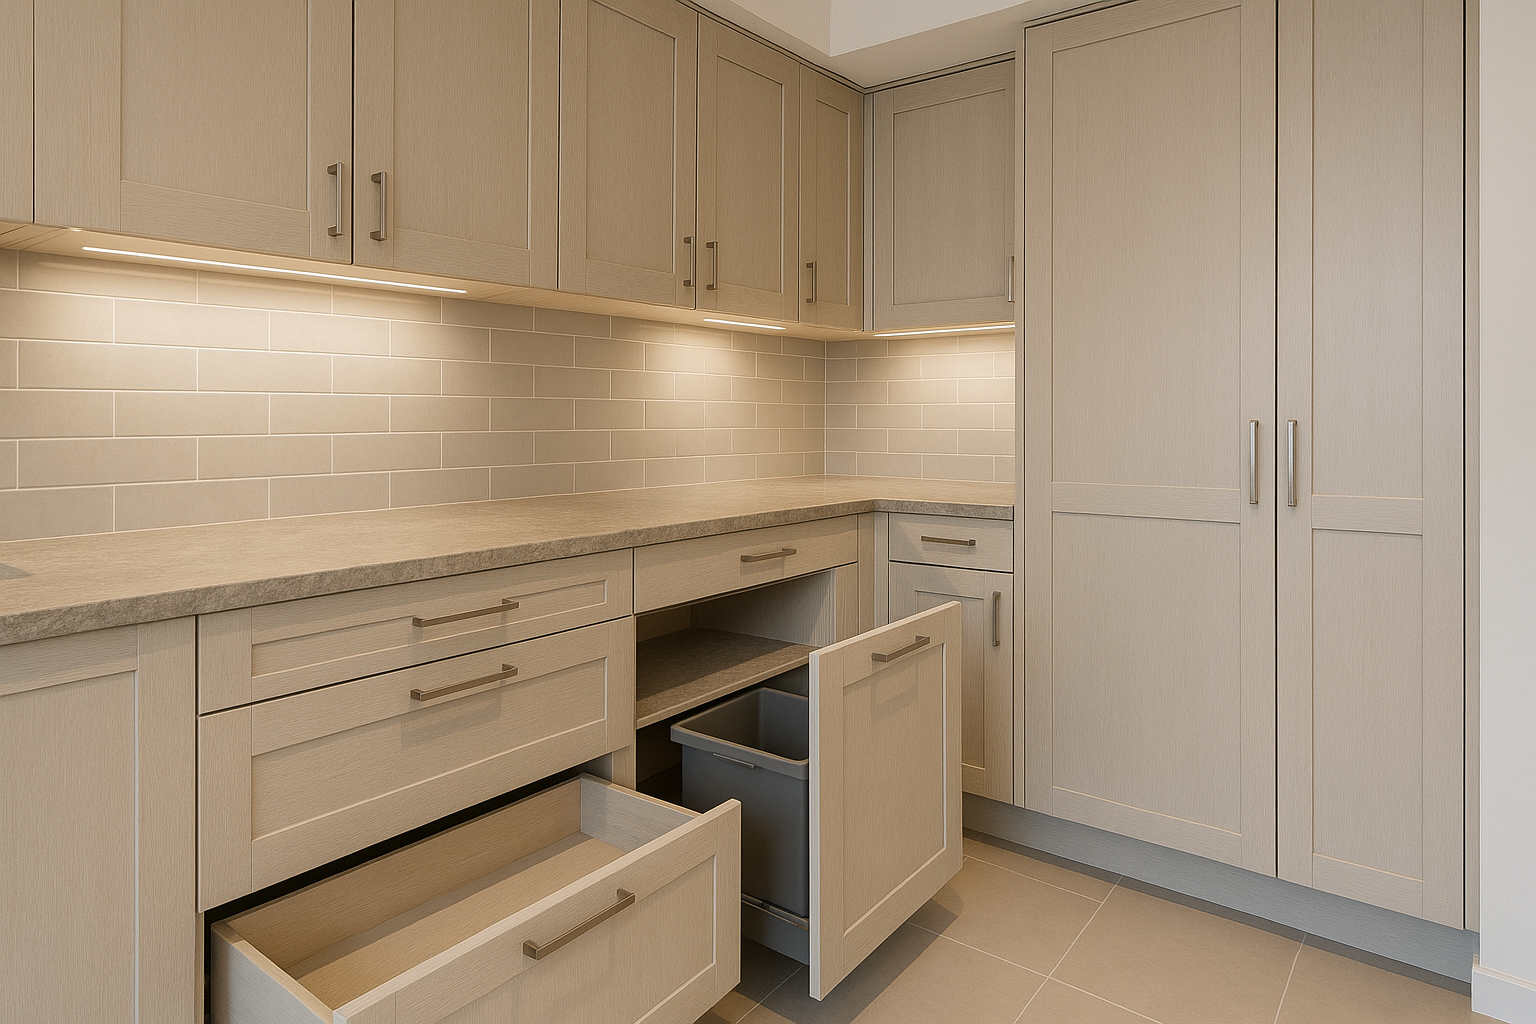
Drawers vs cupboards
If you’re redesigning storage, lean into drawers:
- Drawers bring items to you.
- Cupboards hide items at the back.
- Deep drawers suit pots, appliances, and stacks of containers.
DIY kitchen cabinets and cupboards: where to be cautious
Flat-pack and DIY kitchen cupboards can work for small projects or a temporary update.
Avoid DIY cabinetry if:
- Your floors are out of level and you need precise scribing.
- You’re installing stone benchtops.
- You need a seamless finish around panels, fillers, and end panels.
- You want integrated appliances and tight tolerances.
A kitchen is used hard every day. Cabinet build quality and installation accuracy matter.
Step 6: Benchtops — choose based on use, not trends
Your benchtop takes the most punishment.
A simple way to choose:
- If you want strong stain resistance and minimal fuss, compare engineered stone, porcelain, and quality compact laminate options.
- If you love warmth and don’t mind maintenance, timber can be a great feature bench.
Plan thickness and overhangs early, especially if you want seating.
Step 7: Splashback and finishes that clean easily
Splashbacks are one of the highest-impact visual upgrades in a cosmetic kitchen renovation.
Practical checks before you pick:
- How often do you want to wipe it down?
- Do you prefer fewer grout lines?
- Does it suit your benchtop and cabinetry colours in real light?
If you’re choosing between tiles, glass, or other options, read: Choosing your kitchen splashback.
Step 8: Appliances and services (power, plumbing, ventilation)
Appliances change the plan more than people expect.
Before you order:
- Confirm exact appliance model numbers and dimensions.
- Check ventilation requirements for your cooktop and rangehood.
- Plan power points for small appliances (kettle, toaster, coffee machine) where you will actually use them.
- Decide where the microwave lives (bench, shelf, or built-in).
In Queensland, electrical and plumbing work must be done by licensed trades. Build it into your schedule.
Step 9: Lighting — the part most DIY kitchen renovations miss
Good lighting makes the whole kitchen feel more expensive because it improves how you see surfaces and colours.
Aim for three layers:
- General lighting: ceiling lights to fill the room.
- Task lighting: under-cabinet LEDs over prep areas.
- Feature lighting: pendants over an island, used sparingly.
If you prep food at night, task lighting is non-negotiable.
Step 10: Plan the renovation order (to avoid rework)
A clean sequence keeps costs under control:
- Finalise design, finishes, appliance selections
- Site measure and confirm all service locations
- Demolition (if needed)
- Rough-in plumbing and electrical
- Cabinetry install
- Benchtop measure and install
- Splashback install
- Fit-off: sink, tap, appliances, lighting
- Final adjustments, silicone, touch-ups, clean
This is where DIY kitchen remodel projects often go wrong. People install the wrong item first and pay twice.
DIY kitchen renovation: what you can do yourself (and what to hand over)
If you want a kitchen DIY approach, split the work sensibly.
Good DIY tasks
- Painting walls and ceilings
- Replacing handles and simple hardware
- Installing stick-on or clip-in organisational systems
- Assembling non-structural flat-pack items
- Removing old cabinetry (carefully, and only after services are isolated)
Hand to licensed and experienced pros
- Electrical work, including new circuits and lighting changes
- Plumbing changes and dishwasher connections
- Gas work
- Stone benchtops and accurate templating
- Full cabinetry install where alignment, scribing, and finish matter
If your goal is a result that looks sharp for years, the install matters as much as the design.
If you’re on the Gold Coast: showroom and local support
Seeing finishes in person helps you choose colours and textures that suit your home’s light.
If you’re searching for a kitchen showroom Gold Coast homeowners can rely on for real samples and clear advice, it’s worth booking a time rather than rushing a weekend visit. You’ll make faster decisions with proper guidance and a measured plan.
For local context, you can also read: Building kitchens on the Gold Coast and Kitchens Gold Coast.
A simple checklist before you start spending
Use this as your quick decision filter:
- Layout: clear walkways, landing space, zones make sense
- Storage: enough drawers, pantry plan, bin location decided
- Appliances: model numbers confirmed, ventilation checked
- Services: power points and plumbing locations locked in
- Finishes: door material, benchtop, splashback chosen for cleaning and wear
- Lighting: task lighting included
- Timeline: lead times and trade booking allowed for
Ready to renovate, but want the design locked in properly?
If you’re done with guessing and you want a kitchen that fits your home and routine, talk with Pinnacle Kitchens QLD. We design, manufacture, and install custom kitchens in South East QLD, with 3D rendered drawings so you can see the plan before anything is built.
If you’re comparing options, start here: Why Pinnacle Kitchens?.
CTA: Book a kitchen design consultation and site measure with Pinnacle Kitchens. Ask about our 48 months interest-free option (T’s & C’s apply) and we’ll walk you through a clear plan from design to install.
FAQs
What is the first step in renovating a kitchen?
Start with a clear list of what must change and what can stay, then measure the room and services. Your next decision is whether you’re doing a cosmetic kitchen renovation or replacing the cabinetry and changing the layout.
Can I do a DIY kitchen renovation in Queensland?
Yes, for planning and cosmetic work. Electrical and plumbing must be completed by licensed trades in QLD, especially if you’re moving services or changing circuits.
What’s the difference between a cosmetic kitchen renovation and a full kitchen remodel?
A cosmetic update keeps the existing cabinets and layout, focusing on surfaces and fittings. A full remodel replaces cabinetry and often changes layout, storage design, and services.
How long does a kitchen renovation take?
A refresh can take days to a couple of weeks. A full renovation runs across several weeks once design is approved, cabinetry is made, and install is booked. Product lead times and trade availability matter.
What order should a kitchen renovation happen in?
Design and selections first, then demolition, rough-in trades, cabinetry install, benchtops, splashback, fit-off, and final adjustments.
What are the most common kitchen renovation mistakes?
Poor clearance planning, not allowing for enough drawers and pantry space, missing power point locations, and ordering appliances before confirming cabinet sizes and ventilation.
Should I keep my kitchen layout or change it?
Keep it if workflow already works and you want a facelift. Change it if the kitchen feels cramped, storage is poor, or clean-up and cooking zones are fighting each other.
When should I talk to a kitchen company instead of doing DIY?
If you want new cabinetry, stone benchtops, a layout change, integrated appliances, or coordinated trades, a kitchen company brings design accuracy and installation quality that’s hard to match with a DIY kitchen remodel.