DIY Kitchens: A Practical Renovation Guide (What to Do Yourself, and What to Hand Over)
If you’re pricing up a DIY kitchen renovation, the biggest risk usually isn’t the tools. It’s ordering the wrong things in the wrong order — or discovering too late that a “small change” triggers electrical, plumbing, waterproofing or ventilation requirements.
A kitchen is a chain of decisions: layout, appliances, cabinetry, benchtops, splashback, trades, then finishes. Get one link wrong and the rest turns into expensive rework (or delays while you reorder parts).
This guide is written for Gold Coast and South East QLD homeowners who want a kitchen DIY approach, with clear lines around what you can do yourself and where you should bring in licensed help.
What “DIY kitchens” really means
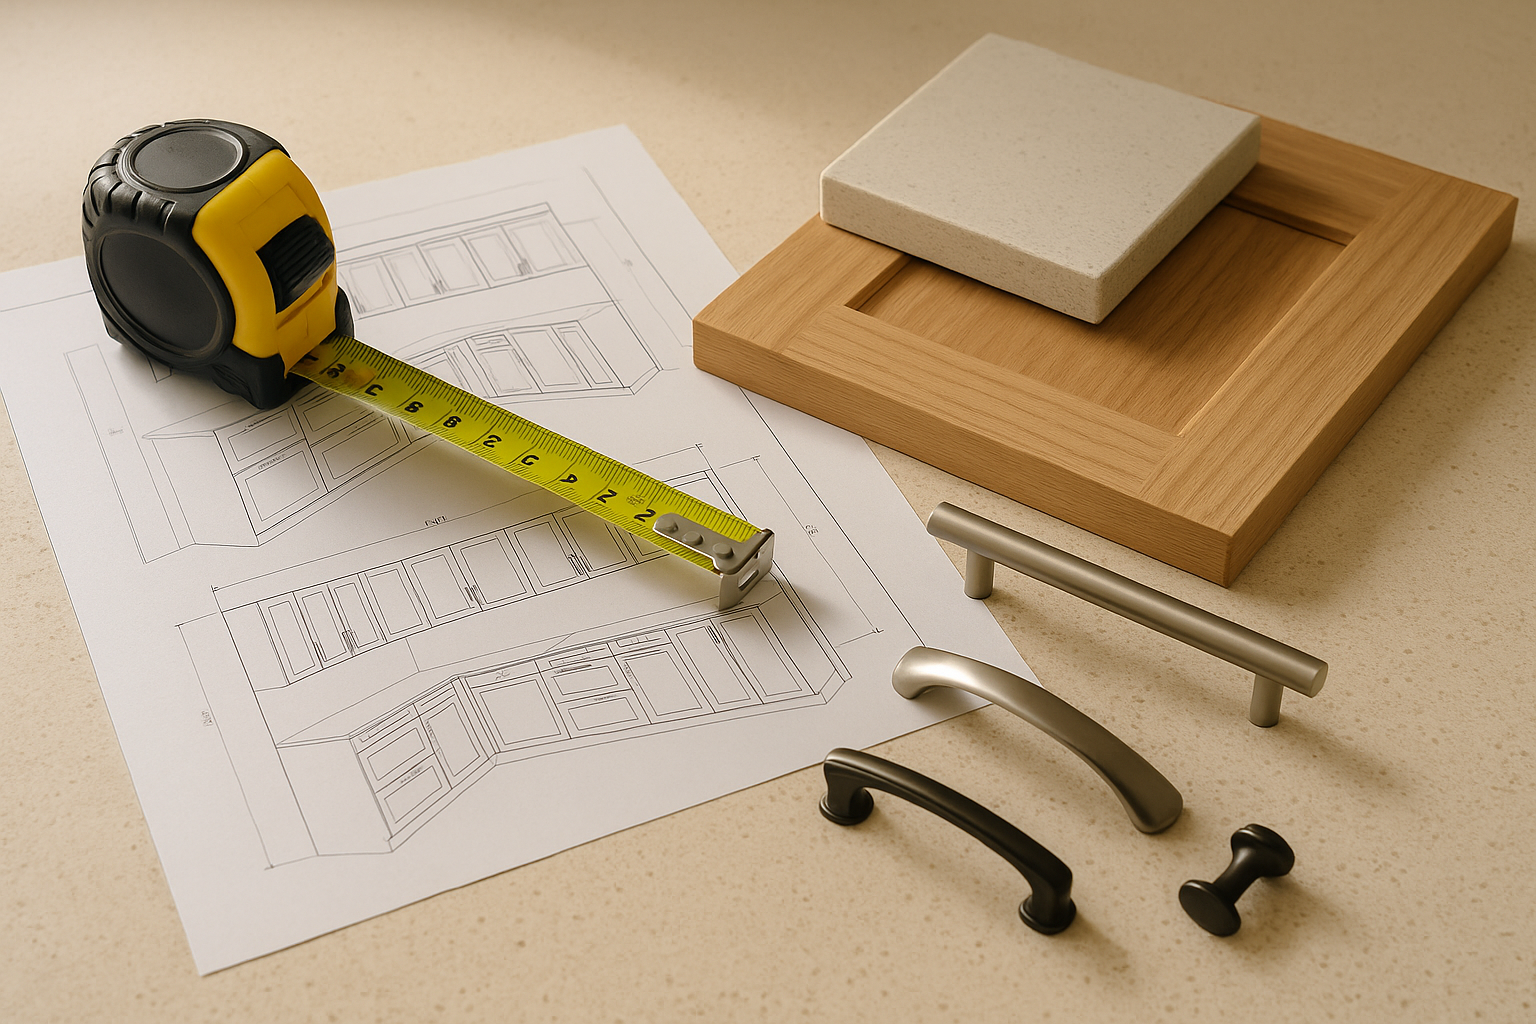
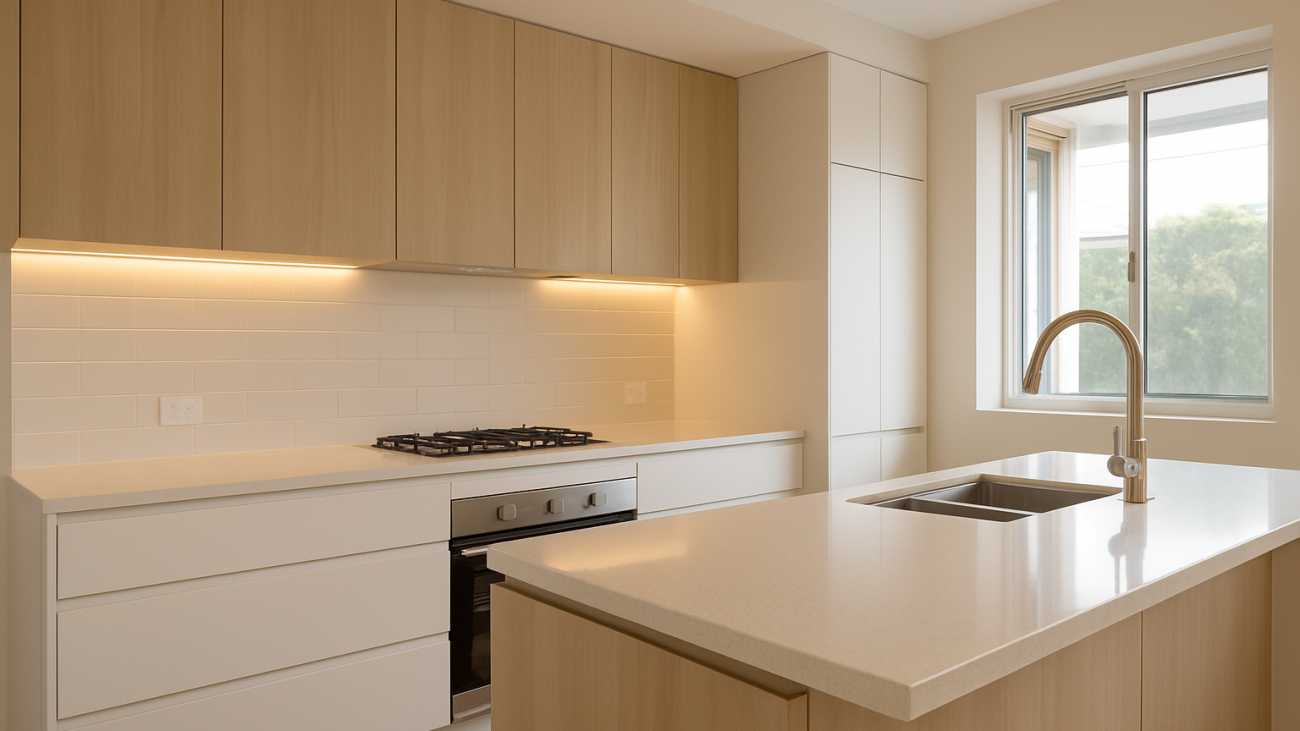
Good DIY kitchens start with measured plans and confirmed finishes.
Most successful diy kitchens aren’t 100% DIY. They’re a mix of:
- DIY tasks you can control safely: planning, demo, painting, organising deliveries, basic hardware.
- Licensed trade work (required in QLD): electrical, plumbing, gas.
- Precision work that determines the finish: cabinetry fit, benchtop install, splashback install.
If you want the best result, treat your project as a diy kitchen remodel with professional checkpoints — especially around measuring, service locations, and install.
A quick reality check for QLD: even when you’re “just swapping a kitchen”, you can still run into rules and standards once you touch wiring, plumbing, gas, mechanical ventilation, or waterproofing. Planning for those handovers early keeps the job moving and helps protect your insurance position.
Step 1: Decide your scope (keep it simple if you want less risk)
Start by choosing one of these scopes:
- Cosmetic upgrade (lowest disruption): keep the same layout, replace doors/handles, new splashback, lighting, paint.
- Cabinetry replacement, same services: new cabinets and benchtops, but keep plumbing and electrical points where they are.
- Full diy kitchen reno: move services, change layout, new lighting plan, possible flooring changes.
If your goal is “best diy kitchens” quality, Scope 2 often hits the sweet spot. You get a new-kitchen feel without taking on the highest-risk parts (moving services and structural changes).
A practical caveat for South East QLD:
- If you’re in an apartment or townhouse, check body corporate rules early. Even if you’re not moving walls, there may be limits around noisy works, waste disposal, lift protection, and work hours.
- If you’re changing anything structural (openings, load-bearing walls, external vent penetrations, window changes), check what approvals or sign-offs apply. Council requirements vary across the Gold Coast and broader SEQ. A quick call to council or a chat with a local building certifier before you start can save you rework.
Step 2: Measure properly (so cabinets arrive and actually fit)
Before you order anything, measure the room carefully. Don’t assume walls are square, floors are level, or that your old kitchen was installed “right”.
Measure and record:
- Wall-to-wall lengths at floor level and bench height (walls are often out of square).
- Ceiling height in several spots.
- Window and door positions, including architraves.
- Any bulkheads, pipes, meters, or beams.
- Floor level changes and slopes.
Also note what your walls are made of (stud wall, masonry, tiled wall) because fixing methods can change.
Gold Coast tip: older homes and some coastal builds can have noticeable movement, patch repairs, or waves in plaster over the years. Measure in more than one place and assume nothing is perfectly straight.
Useful decision guidance before you hit “order”:
- Check you’ve allowed for scribe/filler panels at the ends of runs and beside appliances.
- Allow for skirting boards if they’re staying (or confirm they’ll be removed behind new cabinets).
- If you’re changing flooring, decide whether the new flooring goes under cabinets or up to the kick line — it affects finished heights and dishwasher fit.
Tip: if you’re unsure, pay for a professional check measure. Cabinetry tolerances are tight, and small errors show up fast — especially where tall panels meet ceilings, around fridge cavities, and at corners.
Step 3: Get your layout right (the best kitchen remodelling tips are boring but true)
Good diy kitchen design isn’t about a long list of add-ons. It’s about how you move through the space, where mess collects, and what you reach for every day.
The three zones that matter
Plan around:
- Prep zone: clear bench space near sink and fridge.
- Cook zone: cooktop/oven with a landing area for hot trays.
- Clean-up zone: sink, dishwasher, bin close together.
Keep the high-traffic path clear. If you cook most nights, don’t put the bin across the room. If kids tend to hover, avoid placing the fridge in a spot that turns every snack run into a traffic jam.
Clearances to check before you order
These are the spots that commonly make DIY kitchens feel tight or awkward:
- Walkway width: allow comfortable passing space (and think about bar stools, if you have seating).
- Dishwasher open: it shouldn’t block the main path or trap someone at the sink.
- Fridge doors: confirm swing direction, wall clearance, and whether drawers can open past handles.
- Corner cabinets: drawers and handles must clear each other.
Decision guidance: don’t design for “minimum possible” clearances based on a showroom display. Design for your actual life — tea towels on handles, kids underfoot, a dog water bowl, groceries on the bench.
If you want inspiration that still works in real homes, see our guide to modern kitchen designs and ideas.
Step 4: Lock in appliances early (don’t guess sizes)
Appliances decide cabinetry sizes, power points, and ventilation. “We’ll choose later” often becomes “we chose later and now it doesn’t fit”.
Before finalising plans, confirm:
- Fridge width and height, plus required air gaps (many models specify clearances for ventilation).
- Dishwasher model (not just “a dishwasher”).
- Oven size (600 mm vs 900 mm) and installation requirements.
- Cooktop type (gas vs induction) and the cut-out size.
- Rangehood details and ducting path.
If you’re chasing tidy lines, choose appliances with consistent finishes and handle styles. The kitchen feels calmer.
Decision guidance:
- Induction can reduce heat and moisture load around the cooktop area, which helps cabinetry and nearby finishes over time (helpful in humid SEQ summers).
- Gas introduces extra ventilation considerations and must be installed by a licensed gas fitter.
Also worth checking: warranties and installation requirements often assume compliance with Australian Standards and the manufacturer’s clearances. If you’re DIY-ing the surrounding cabinetry, build to the spec sheet, not a generic dimension.
Step 5: Choose cabinetry that holds up (what to look for in diy kitchen cabinets)
Cabinetry takes the daily knocks: steam, spills, kids, pets, and cleaning.
On the Gold Coast and across coastal South East QLD, humidity and salty air can be hard on cheaper hardware and poorly sealed panels. That doesn’t mean you need “marine grade everything”, but it does mean choosing sensible materials and fittings — and making sure edges and cut-outs are properly sealed.
Here’s what separates long-lasting cabinets from short-term frustration:
Board and edging
- Moisture resistance: important around sink and dishwasher. Also think about where the kettle, air fryer and coffee machine live — steam has a habit of finding weak spots.
- Good edge sealing: poor edging swells first, especially on the bottom of doors and panels near wet zones.
DIY caveat: any on-site cut-outs (for plumbing penetrations, service notches, dishwasher side clearances) should be sealed to protect the board. A small unsealed edge in a wet zone can undo an otherwise good cabinet.
Hardware
- Soft-close hinges and drawer runners: choose proven hardware, not unknown no-name.
- Full-extension drawers: you can actually reach the back.
A simple tip: if you’re close to the beach, prioritise quality drawer runners and hinges. They’re the bits you touch every day, and they’re often the first to feel “gritty” if quality is low.
If you’re buying locally, most cabinetry and hardware suppliers around the Gold Coast and SEQ can point you towards suitable grades for coastal conditions. It’s worth asking the question upfront rather than replacing hinges later.
Storage that earns its keep
For practical diy kitchen improvements, prioritise:
- Deep drawers for pots and pans.
- A full-height pantry (cabinetry that runs to the ceiling).
- A proper bin pull-out near the prep zone.
- Tray dividers near the oven.
If you’re comparing diy kitchen cupboards vs custom, ask yourself one question: do your walls and floor look straight? If not, custom cabinetry and professional install can reduce visible gaps, oversized fillers, and doors that fight each other.
Step 6: Benchtops and splashbacks (easy-clean beats fussy)
Your benchtop and splashback are the true work surfaces. They need to handle heat, moisture, cleaning products and the occasional hard knock.
Local climate note: in humid conditions, ventilation and extraction do more than improve comfort. Reducing lingering moisture helps protect joins, silicone lines and cabinet interiors over time — particularly around the sink, dishwasher and any appliance garage.
Benchtop tips
- Choose a finish that hides everyday marks (high-gloss and very dark tops show fingerprints and dust faster).
- Plan joins away from the sink if possible.
- Confirm overhangs for seating and legroom.
Also confirm thickness and edge profile early. It affects appliance clearances, especially for dishwasher doors and underbench ovens.
DIY caveat: benchtop installs (especially stone) rely on a level, properly fixed cabinet base. If the cabinetry is even slightly out, you can end up chasing gaps, uneven reveals, or stressed joins.
Splashback tips
- Fewer grout lines are faster to clean.
- Match the splashback height to your cooking style (heavy frying and wok cooking usually needs more coverage).
- Confirm power point positions before the splashback goes on.
Practical caveat: if you’re changing splashback materials (say, tiles to glass or stone), allow time for wall prep. Old tile adhesive and damaged plaster is common, and it’s easier to fix before new cabinetry and benchtops are in the way.
If you’re choosing materials, our guide to choosing your kitchen splash back walks through practical options.
Step 7: What you can DIY vs what needs licensed trades (QLD reality check)
A clear division of labour keeps your diy kitchen renovations safe, legal, and insurable.
In Queensland, electrical and plumbing work must be done by appropriately licensed trades. If you’re making structural changes (removing a wall, altering openings), talk to the right professional early — and check whether council approvals apply.
If you’re on the Gold Coast or elsewhere in South East QLD, local council requirements can also affect things like ventilation discharge (especially if you’re ducting to the outside), waste connections, and any building work that changes the structure. When in doubt, ask before you start — it’s cheaper than redoing finished work.
For electrical work, your electrician will work to the AS/NZS 3000 (Wiring Rules). For plumbing and drainage, your plumber will work to the relevant Australian Standards and Queensland plumbing requirements.
Depending on what you change, other requirements can come into play too (for example, waterproofing to wet areas is commonly assessed against AS 3740 where applicable, and general building work is governed through the NCC). You don’t need to memorise the codes — you do need to involve licensed trades where the law requires it.
DIY tasks that suit homeowners
- Removing old doors, drawers, and hardware.
- Careful demo of cabinetry (watch for hidden services).
- Painting walls and ceilings.
- Installing handles if the hole spacing matches.
- Organising delivery access and rubbish removal.
Practical safety note: switch power off at the board before removing anything near existing power points, and don’t assume a “dead” point is actually isolated. Treat all cabling as live until tested.
Work that needs licensed trades
- Electrical work (power, lighting, appliance circuits).
- Plumbing work (water, waste, dishwasher connections).
- Gas fitting.
Even if you can physically do some of this work, it’s not just about capability — it’s about compliance, certification, and protecting your home if something goes wrong.
Precision work that often decides the final look
- Cabinet installation and levelling.
- Benchtop measuring and fitting.
- Splashback installation.
If you want a DIY build feel without the stress, plan a hybrid: you handle the prep and coordination, then a professional team handles the fit and finish.
This is also where local accountability matters. If something needs adjusting after trades have fitted off (a door reveal, a panel scribe, a drawer rubbing after seasonal movement), having in-house licensed installers reduces the “not my job” gaps that can happen when multiple subcontractors are involved.
Step 8: A step-by-step sequence that avoids delays
Use this sequence for most kitchen DIY renovations:
- Finalise layout and appliance specs.
- Confirm cabinetry design and order.
- Book licensed electrician and plumber for rough-in dates.
- Demo and site prep.
- Fix walls, flooring decisions, and paint where needed.
- Install cabinetry and check levels.
- Benchtop measure, then install.
- Trades return for fit-off (plumbing, electrical, appliances).
- Splashback install.
- Final adjustments: doors, drawer fronts, silicone, touch-ups.
Avoid booking trades “based on guesses”. Book them against confirmed delivery and install dates.
If you’re relying on multiple suppliers (flat-pack, stone, tiles, appliances), build in a buffer for backorders and damaged deliveries — it happens. Plan where items will be stored so they stay dry and flat.
Gold Coast/SEQ practicalities: allow for weather and access. Humid days can slow paint curing and silicone set times, and sudden storms can affect deliveries if materials are being stored in garages or outdoor areas.
Common DIY kitchen installation problems (and how to prevent them)
These show up again and again:
- Walls out of square: plan for scribes and fillers, or use custom cabinetry.
- Uneven floors: cabinets must be levelled properly before benchtops.
- Power points in the wrong spot: confirm heights and locations early (including inside cupboards for appliances).
- No landing space: you need bench beside the fridge, sink, and cooktop.
- Poor ventilation planning: rangehood ducting needs a real path (not just “we’ll figure it out”).
Another common one in real homes: old plaster and tile surprises. Budget time (and some money) for patching walls, replacing damaged cornices, and making good where old splashbacks come off.
And one that catches DIY renovators: moisture management around dishwashers and sinks. A small drip you don’t notice can swell panels over months. Fit drip trays where appropriate, seal cut-outs, and make sure the dishwasher cavity has the clearances the manufacturer calls for.
If you’re building or renovating locally, our article on building kitchens on the Gold Coast is worth reading before you lock in timelines.
Want the DIY control, but with a professional outcome?
If you’ve started planning diy kitchens and want the result to look crisp and last, we can help with the parts that matter most: design, manufacturing, and installation.
At Pinnacle Kitchens, we design, manufacture, and install custom kitchens in South East QLD. A key difference when you’re mixing DIY with pro work is accountability — having in-house licensed installers reduces the handover gaps that can happen when multiple subcontractors are involved.
We also provide 3D rendered drawings during design so you can see the layout before anything is ordered.
If you’re comparing options for new kitchens Gold Coast, here’s a simple next step:
Book a design consult with Pinnacle Kitchens and bring:
- your room measurements and photos
- appliance models (or links)
- a short list of must-haves (storage, seating, finishes)
Ask us about 48 months interest-free (T’s & C’s apply) if you want to stage your renovation spend.
You can also read why Pinnacle Kitchens if you want to know how we approach materials, build quality, and in-house licensed installation.
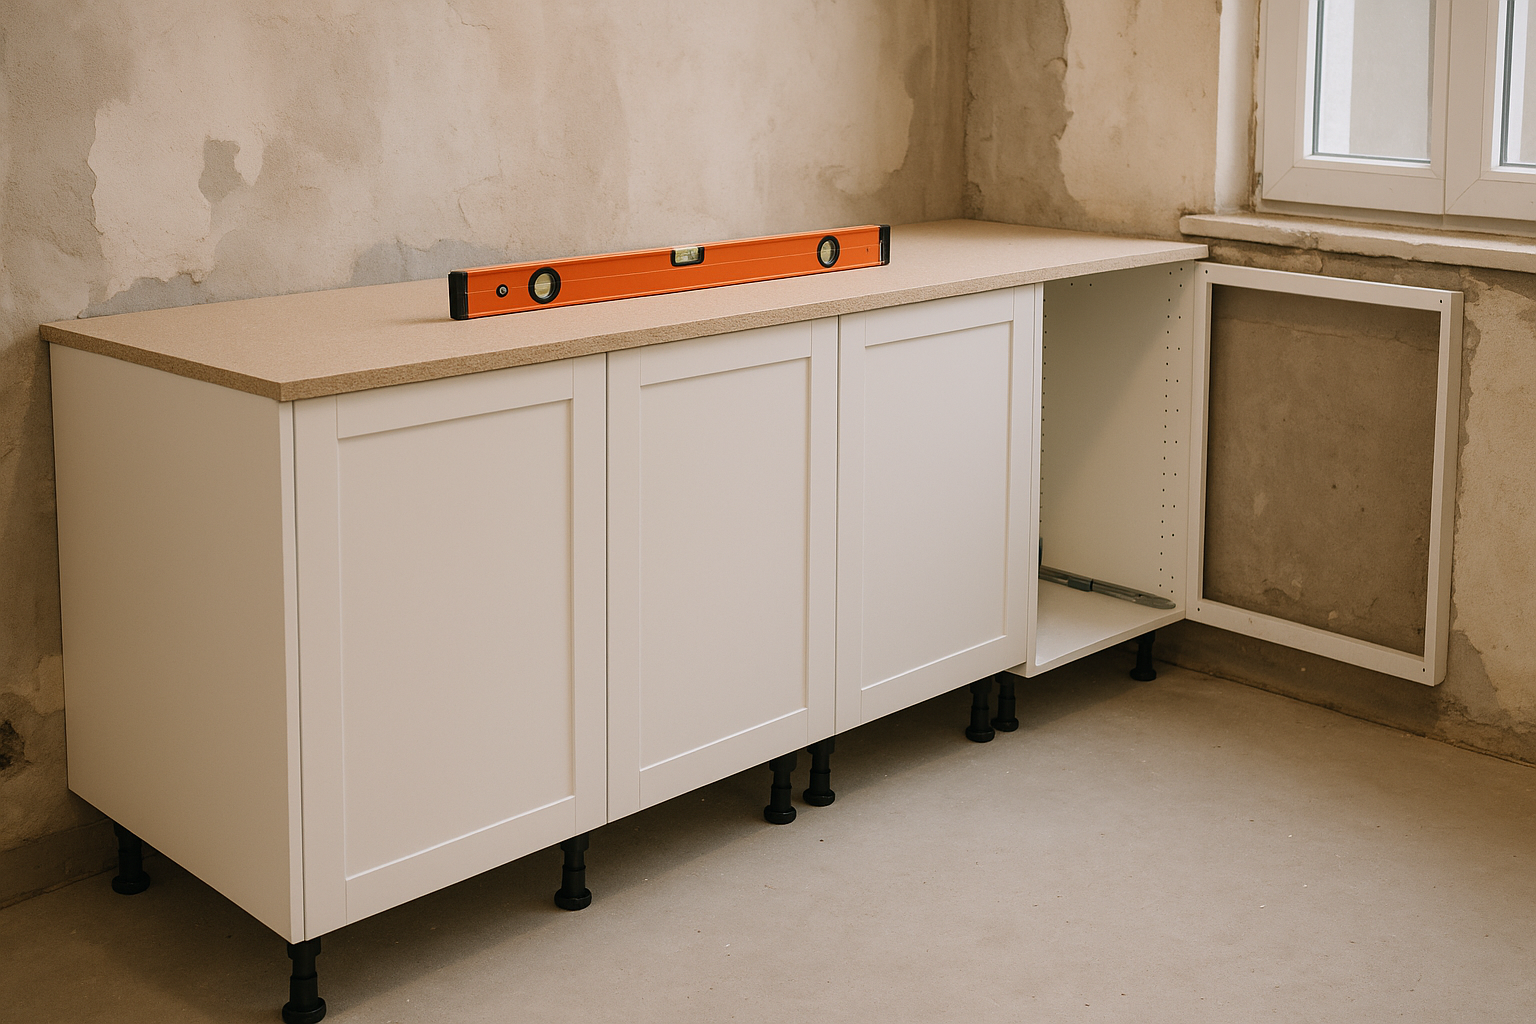
Cabinet alignment and levelling set up the whole kitchen.
Quick FAQs about DIY kitchens
Is it cheaper to do a diy kitchen remodel?
DIY can reduce labour costs if you’re skilled and organised. The biggest cost blowouts usually come from wrong orders, rework, and trade call-backs (for example, power points needing to be moved after cabinetry arrives). Spend more time on planning than demolition.
Also consider the “hidden” costs: tool hire, tip fees, delivery fees, patching materials, and the extra week (or three) you might be without a functioning kitchen if timelines slip.
What are the best diy kitchens made from?
Look for cabinetry materials and hardware that suit daily wear: moisture resistance near water, durable finishes, and reliable drawer runners and hinges. In coastal and humid parts of QLD, careful sealing, decent ventilation, and good hardware quality make a noticeable difference over time.
Can I keep my existing layout and still get a “new kitchen” feel?
Yes. Keeping services in place is one of the most reliable kitchen remodelling tips for a smoother renovation. New cabinetry, better storage, updated lighting, and a well-chosen splashback can change the whole room.
What should I do first: splashback or benchtop?
Benchtop first, then splashback. The splashback is finished to the final benchtop height, and power points need to be confirmed before it goes on.
How do I choose between flat-pack and custom cabinetry?
Choose flat-pack for simple runs and standard sizes where walls and floors are straight. Choose custom if you want full-height storage, better gap control, and a more tailored fit — particularly in older Gold Coast homes where floors can be out of level and walls can wander.
Can you help if I already have a plan?
Yes. If you’ve drafted a diy kitchen design, we can review it for appliance fit, clearances, storage function, and installation practicality before you commit.